How To Make Coconut Whipped Cream
Coconut whipped cream has become a staple in culinary art, offering a delicious and dairy-free alternative to traditional whipped cream. It’s crafted using a blend of coconut milk, a choice of sweetener, and optional flavorings to enhance its taste.
This versatile topping is incredibly easy to create, requiring nothing more than a good-quality can of full-fat coconut milk as a starting point. Its simplicity belies the exceptional taste and texture it adds to many desserts.
My Carrot Cake, Mango Cheesecake recipes, have coconut whipped cream. If you haven’t tried coconut whipped cream as yet then my recipe is a great place to start.
The process is straightforward: selecting an unsweetened coconut cream is ideal for achieving the rich and airy consistency desired for a perfect vegan whipped topping. However, if coconut cream is out of reach, full-fat coconut milk can suffice.
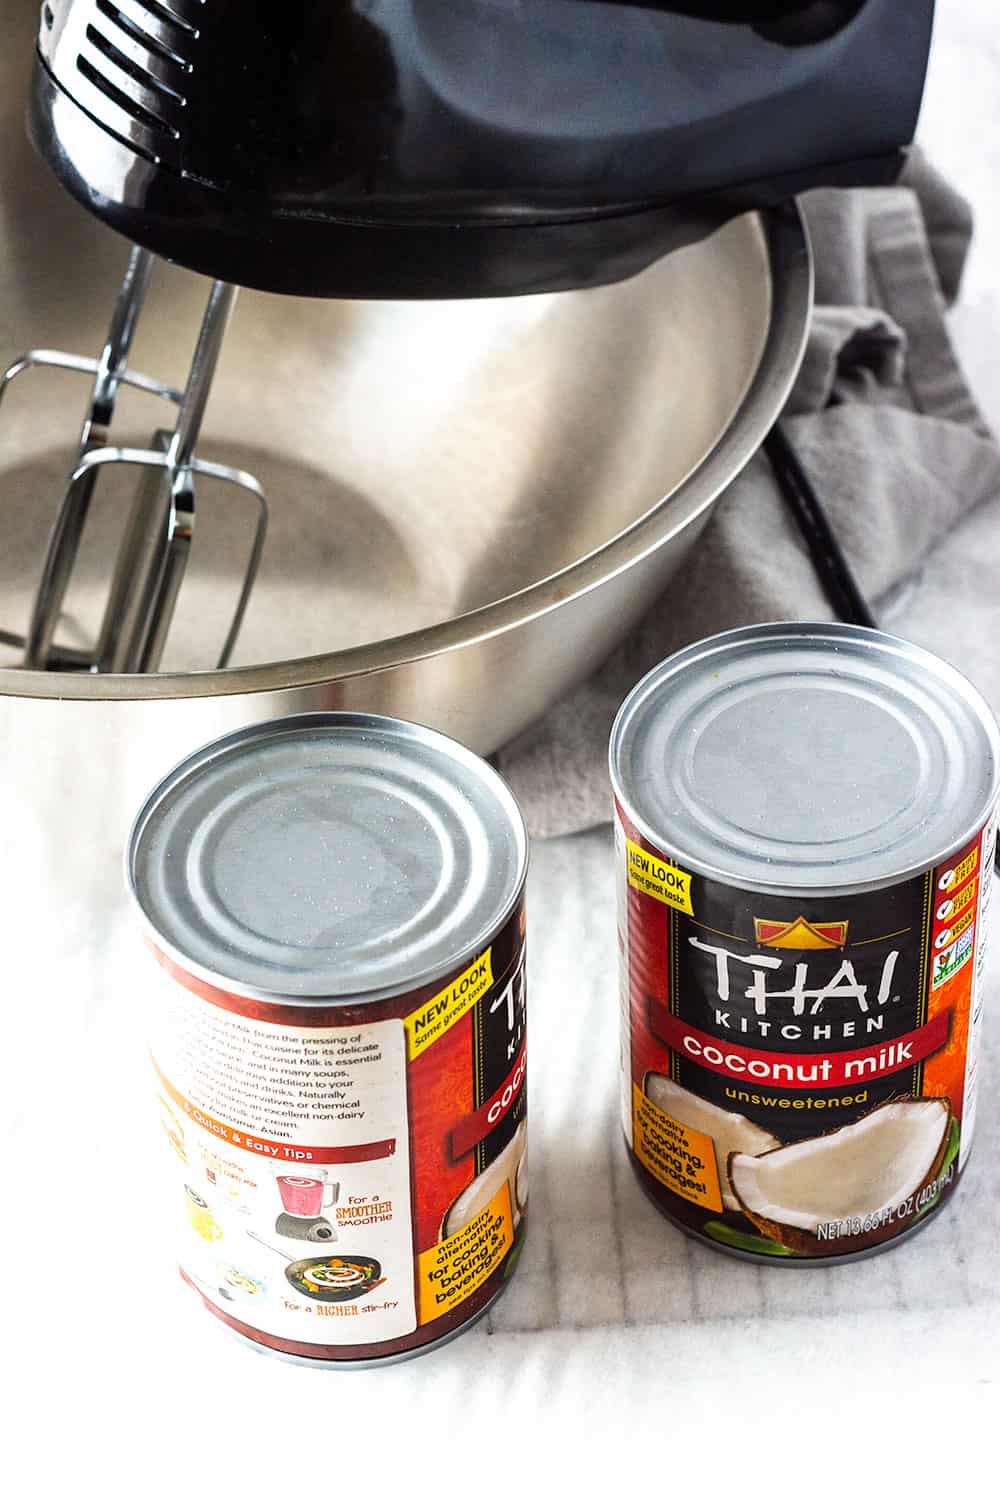
The quality of the coconut milk is pivotal; brands such as Thai Kitchen, Trader Joe’s, Whole Foods 365, Native Forests, and Goldenstar are highly recommended in the United States for their superior fat content. A useful tip for those picking out coconut milk in-store is to give the can a shake; a more liquid sound may indicate a lower cream content, which is less desirable for whipping.

Creating Coconut Whipped Cream
Before beginning the preparation, ensure both the mixing bowl and beaters are chilled in the refrigerator for at least one hour. Utilize full-fat coconut milk or cream that has been refrigerated for a minimum of eight hours without being shaken.
Instructions:
- Carefully open the cans and separate the solid coconut cream from the liquid.
- Reserve the liquid for later use such as in smoothies, stews, or curries.
Whipping Process:
- Transfer the coconut cream to the chilled mixing bowl.
- With the handheld mixer using the cool beaters, whip the cream until it becomes smooth and reaches peak consistency, roughly two minutes.
- Incorporate powdered sugar and vanilla into the mix, continuing to whip for another minute.

Tips:
- For additional sweetness: Taste and add more sweetener if desired.
- To increase thickness: Incrementally mix in additional powdered sugar.
Serve this coconut whipped cream with a warming beverage such as a Hot Carob Drink.
Other Vegan Desserts To Try:
If you make this recipe, snap a photo and hashtag #healthiersteps — we love to see your recipes on Instagram, Facebook & Twitter!
Also please leave a star rating ;-)
Need some encouragement on your Healthier Steps journey?
Join our new Facebook groups, sharing lots of delicious vegan and gluten-free recipes, health tips etc., from our members. Please join us and invite your friends Gluten-Free and Vegan For Beginners and Vegan Recipes With Love.
Want to Save This Recipe?
Enter your email & I'll send it to your inbox. Plus, get great new recipes from me every week!
By submitting this form, you consent to receive emails from Healthier Steps.

How To Make Coconut Whipped Cream?
Ingredients
- 2 14-ounce cans unsweetened coconut milk or 2 cans coconut cream
- 1/4 cup organic powdered sugar
- 1 teaspoon vanilla
Instructions
- Place 2 cans of unopened coconut milk in the refrigerator for 8 hours or preferably overnight. One hour before making your coconut whipped cream, place the mixing bowl and the beaters for your mixer in the refrigerator.
- Remove the cans from the refrigerator and carefully open the cans, making sure you aren't shaking the cans. Scoop out the coconut cream into the chilled bowl and save the remaining liquid for making smoothies, curries and sauces.
- Attach the beaters to the mixer and whip the coconut cream until soft and fluffy with peaks, for about 2 minutes. Stir in sugar and vanilla and beat for another minute. Serve immediately or store in a closed container in the refrigerator for about 5 days.


Thank you for showing me how to make coconut whipped,
Hi Michelle,
If I lessen the amount of powdered sugar, would it affect the results?
It wouldn’t at all, just make sure your coconut milk is chilled and you drain off the clear liquid.
Thank you very much, Michelle
You are welcome Verna, blessings!
I made this recipe for the first time and it turned out great, thank you!
I’m so happy it turned out great, thank you Charity.
Hi Michelle
I hope this question reaches you and I apologize if it goes elsewhere. The comment section kept giving me an error message.
For your sweet potato recipe, have you ever cooked two at the same time? I tried the recipe and family enjoyed it. I did not make the coconut whipped cream but I will be making the next time. Thank you for the response.
Charles, I’m sorry this is happening with the error message. I’m not sure why. No I haven’t made two sweet potato recipes at the same time but I probably will do for the holidays.
Hi Michelle,
I have nit tried this recipe, but I plan to. The recipe calls for powdered sugar, but is it OK to use regular sugar? Sorry if this question has a very obvious answer. I don’t have any powdered sugar handy.
Thanks
Nicole by the way, that is a great question. You can use regular sugar or blend your regular sugar in a blender.
You can blend regular sugar, but if you do, I would add a bit of cornstarch to it if available. Perhaps 1 or 2 teaspoons per cup of sugar.. you see its because most powdered sugars also contain a bit of cornstarch. This helps quite a bit helps quite a bit in whipped cream becoming thick and fluffy and also maintaining that consistency.. Thats the major reason that most whipped cream recipes reccomend powdered sugar instead of granulated. As a big time at home baker I have found this to be true whenever I’m making homemade whipped cream.. although in a pinch, granulated sugar will work. If you are using plain granulated, without blending, then add it quite early to the whipped cream, as soon as it starts to thicken, or you may end up with some crunchy bits in your whipped cream, as I sometimes have. Never minded them though and in some dishes, ive even preferred it as a different touch. With powdered sugar, you can wait until soft peaks start to form. Lol. Sorry if I’ve gone too deep into the sugar/whipped cream subject, I tend to drawl on when discussing baking…lol.With my sweet tooth, Its hard to not do so ! Hope that helps ! This coconut whipped cream looks amazing though and I cant wait to try it ! I think it would be divine on some pineapple cake !
Thank you Annet, I agree with everything you said. When I made whipped body butter for sale, I used to add a little cornstarch, it helped to cut down own the greasy feel and keep it fluffy. Somehow I don’t add it to my personal batches but see why it would work. Blessings.